
Selling, receipts and returns
The full sale on the cashier screen: adding, editing, paying, printing and returns.
- Reading time
- 3 min read
- Steps
- 8 steps
- Level
- Beginner
- Updated
- Updated October 10, 2026
The POS interface is in Arabic; screenshots and button names are shown as they appear in the app, with English explanations.
The “Point of sale” screen is built for speed: one input for barcode, code and name, an editable cart, and payment buttons at the bottom. A shift must be open before selling.
1Open the shift
Opening the POS asks you to open a shift with the opening cash. The shift number shows at the top.
2Add items
Scan, type a quick code, or “quantity*code” (e.g. 3*101), or press a quick button on the side. A carton barcode adds the carton at its price.
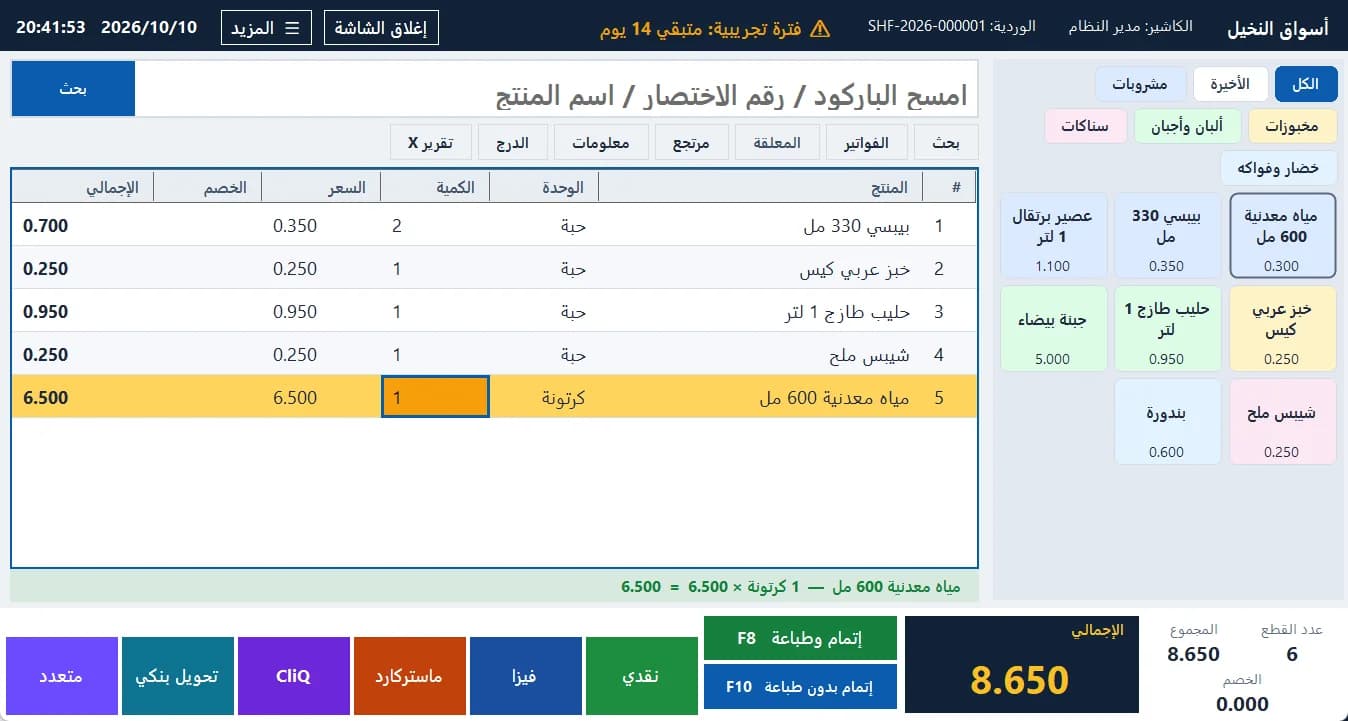
The supermarket cashier screen: barcode cart, units and cartons, payment buttons · Arabic interface 3Edit in the cart
Edit quantity, price, discount or total right in the line, within your role's permissions. A price below the minimum needs a manager approval, and a reason can be required.
4Pick the payment and complete
Choose cash, Visa, Mastercard, CliQ, bank transfer or “Split”, then “Complete & print” (F8) or “Complete without printing” (F10).
5Hold and resume
“Held” parks the cart to serve another customer and bring it back. The open cart auto-saves every 2 seconds and returns after a power cut.
6Returns
Press “Return” or scan the printed receipt barcode (INV-year-number) to open it and return items within the returns policy.
7Close the shift
At the end, close the shift and count the cash; the difference and the Z report appear. “X report” shows the current state without closing.
8Sales history
“Sales” lists every invoice with details, reprint (as a copy) and national e-invoicing status.
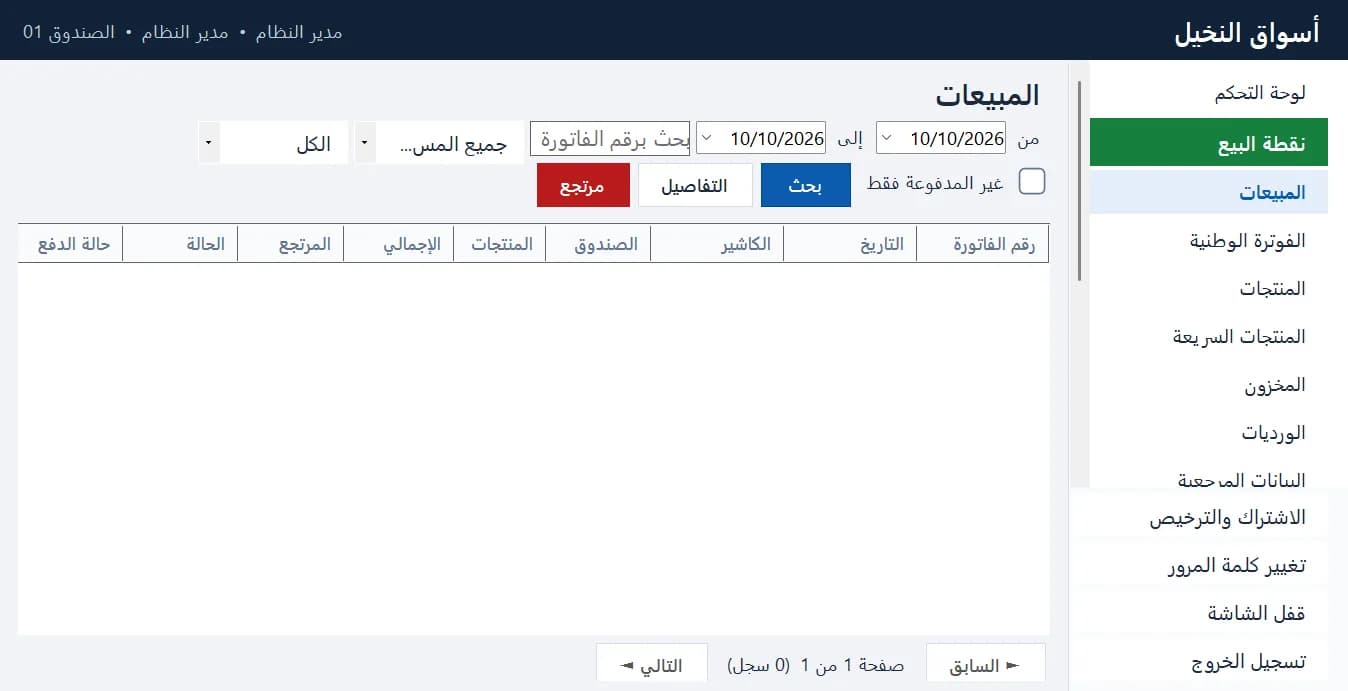
Sales and invoices · Arabic interface