
Restaurant mode: items, options and order types
Takeaway, dine-in, pickup and delivery, options and extras, notes and the kitchen.
- Reading time
- 3 min read
- Steps
- 7 steps
- Level
- Intermediate
- Updated
- Updated October 10, 2026
The POS interface is in Arabic; screenshots and button names are shown as they appear in the app, with English explanations.
In the restaurant edition the cashier screen shows categories, then item cards, builds the order with its options, then takes payment.
1The restaurant cashier screen
Pick a category on the side, then an item. The order and total show on the other side, with quantity, note, delete and payment buttons below.
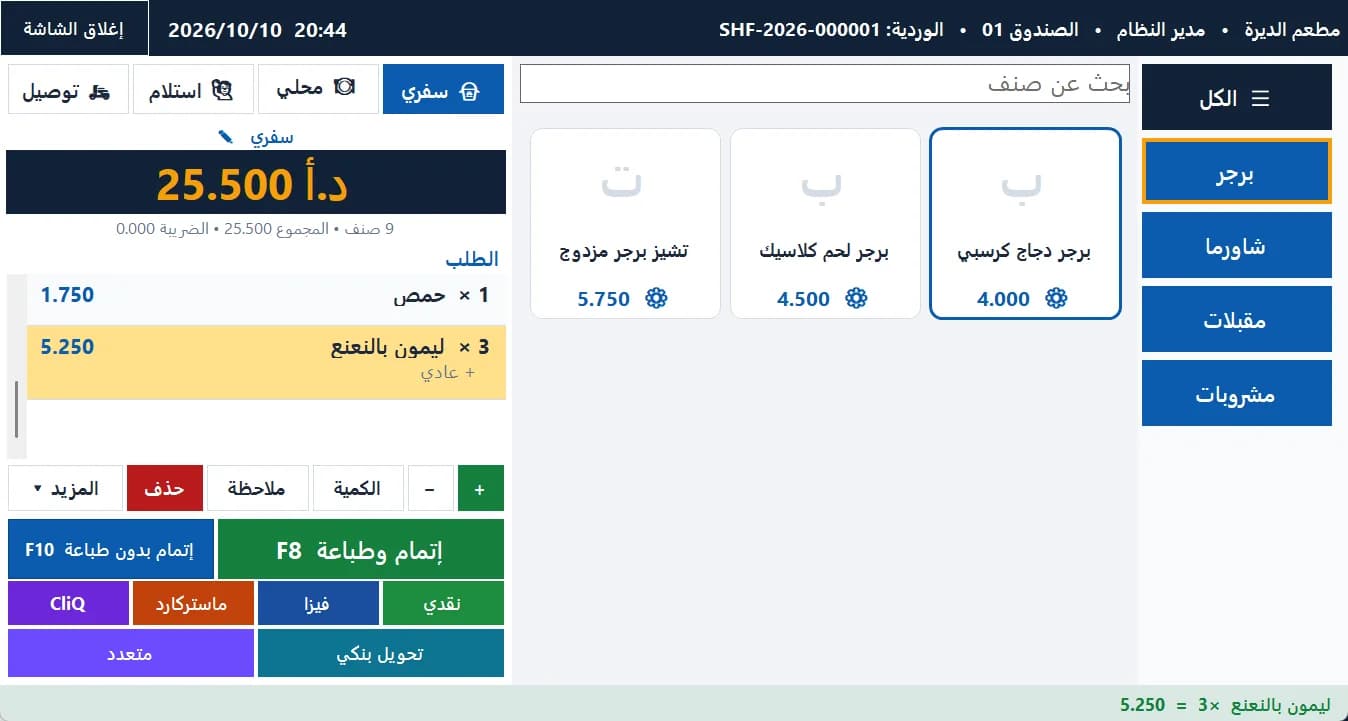
The restaurant cashier: categories, item cards, an order with options and order types · Arabic interface 2Order types
Takeaway, dine-in, pickup and delivery as buttons above the order. Takeaway gets a daily number, dine-in a table, pickup and delivery the customer's name and phone.
3Option groups
Create groups like “Size” (required, one choice) and “Extras” (up to 3) with price differences, and link them to items. A required option can't be skipped.
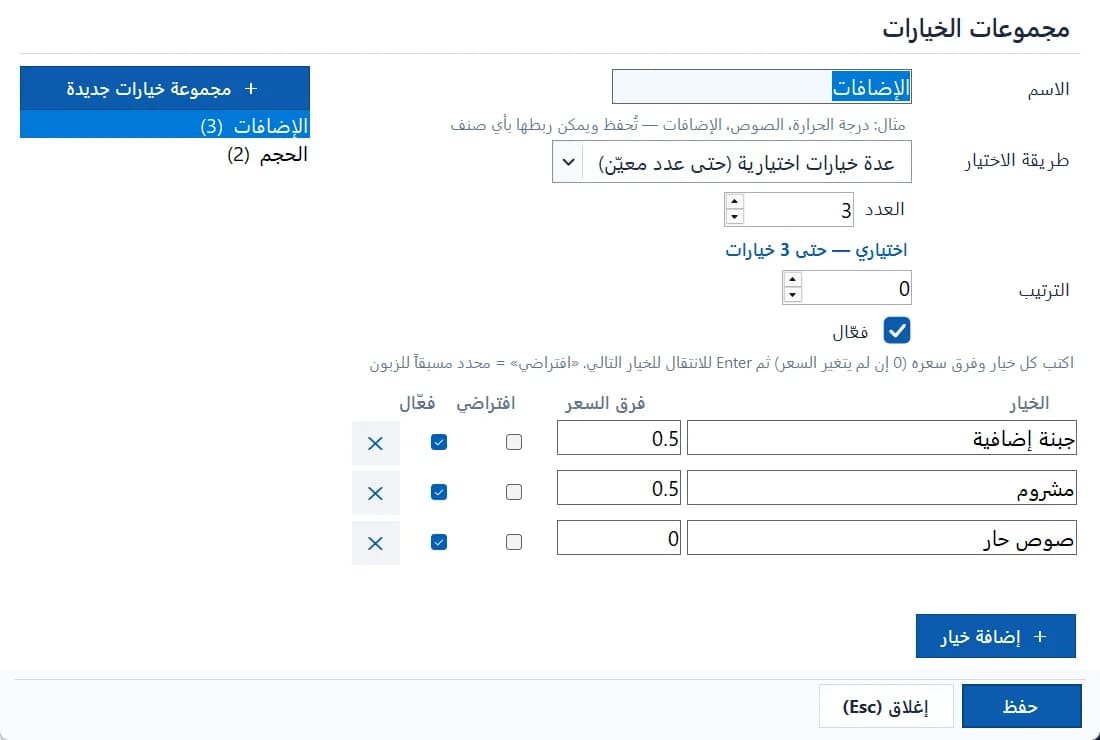
Restaurant option groups (size, extras) · Arabic interface 4Notes
Add one or more notes per item (no onions…). Every note a cashier types is remembered as a quick note.
5Delivery and customers
Delivery fees by area in Settings. Pickup and delivery customers are remembered by phone and filled in automatically as you type.
6The kitchen
Kitchen tickets print automatically at payment (no amounts), or enable “Send to kitchen” for tables that pay later — only what wasn't sent yet is printed.
7Sold out
From an item's menu choose “Sold out” until a time or until further notice.