
First-run setup: store, currency, admin and cashier
The first-run setup wizard, step by step.
- Reading time
- 3 min read
- Steps
- 7 steps
- Level
- Beginner
- Updated
- Updated October 10, 2026
The POS interface is in Arabic; screenshots and button names are shown as they appear in the app, with English explanations.
On the first start the “First-time setup” wizard appears. Everything entered here can be changed later in Settings.
1Business type
Choose “Supermarket / grocery” for barcode, scale and carton selling, or “Restaurant / café” for the picture-card screen with takeaway, dine-in and delivery. Once activated, the license decides the edition.
2Store details
Store name, phone, address and tax number. They appear in the receipt header.
3Currency and tax
Currency symbol (د.أ), code (JOD) and decimals (3 for the dinar), the default tax rate and whether prices include tax.
4System administrator account
Username, full name and a password of at least 6 characters. Only the system administrator enters the license code and changes sensitive settings.
Keep the administrator password somewhere safe.
5First cashier (optional)
Create a cashier account now, with a 4–8 digit PIN for quick sign-in.
6Backups and finish
Pick the backup folder. You can enable “Add demo products for training” — products and stock only, no fake sales. Then “Finish setup” and sign in.
7The dashboard
After signing in you see today's sales, average receipt, returns, discounts, stock value and the current shift, plus alerts such as “no backup yet”.
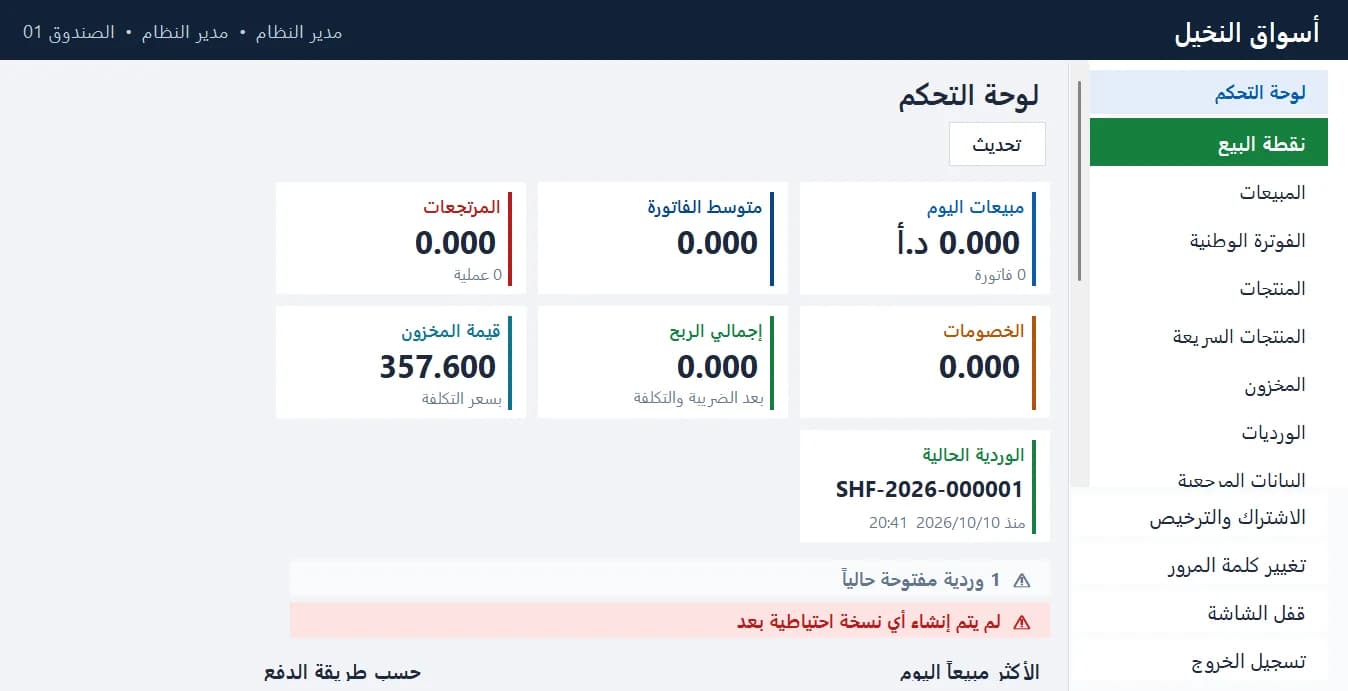
The dashboard: today's sales, discounts, stock value and the current shift · Arabic interface